How to submit your final design

To submit your final design please follow these instructions:
Capture1
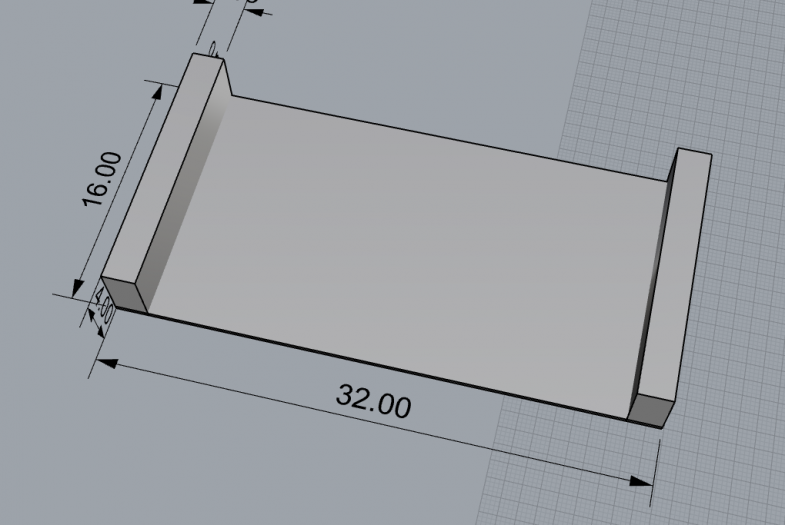
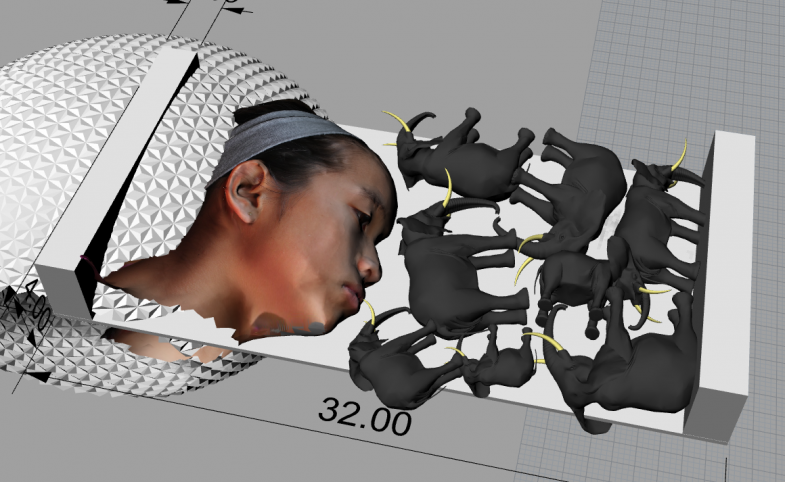
Ensure that your workbox and dimensions are still in place, and accurately aligned.
Capture2
It’s okay for your design to be wider than 16″, but make sure it is no taller than 4″.
Please unlock all of your layers, and to reduce the size of your file, delete old unused layers.
Capture4
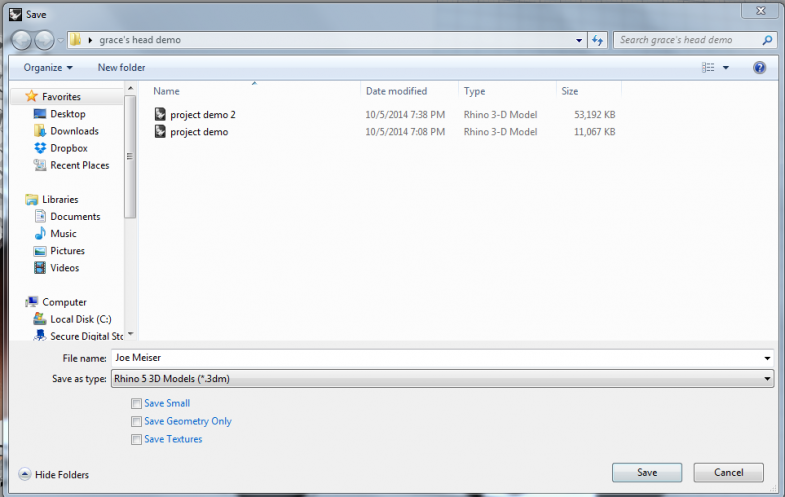
Click File > Save AS > and enter your own name as the name of the file.


Once you’ve completed the steps listed above, please put your final file in the digital sculpture dropbox.  You can get there by following this path: Click the start button in the lower left corner of the screen > click Computer > Projects  > Digital Sculpture > Public > drop_box


How to create reference images for carving

After turning in your file, please create reference images to use for the carving process by following these instructions:
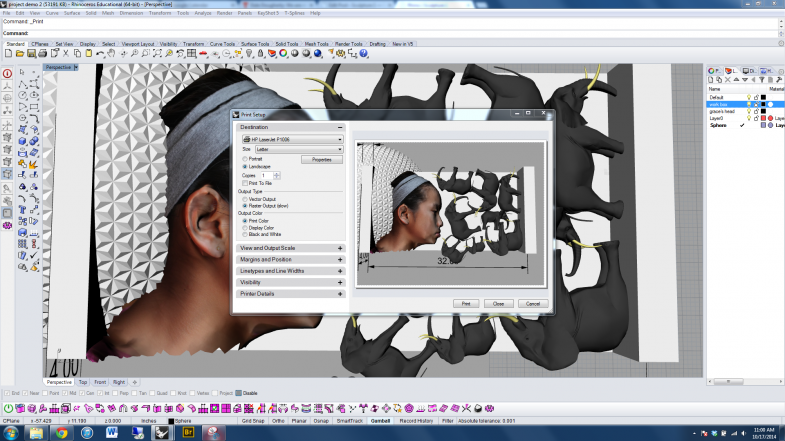
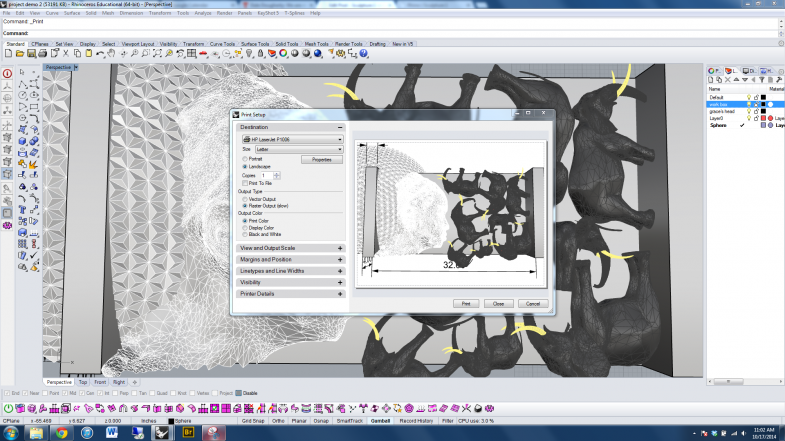
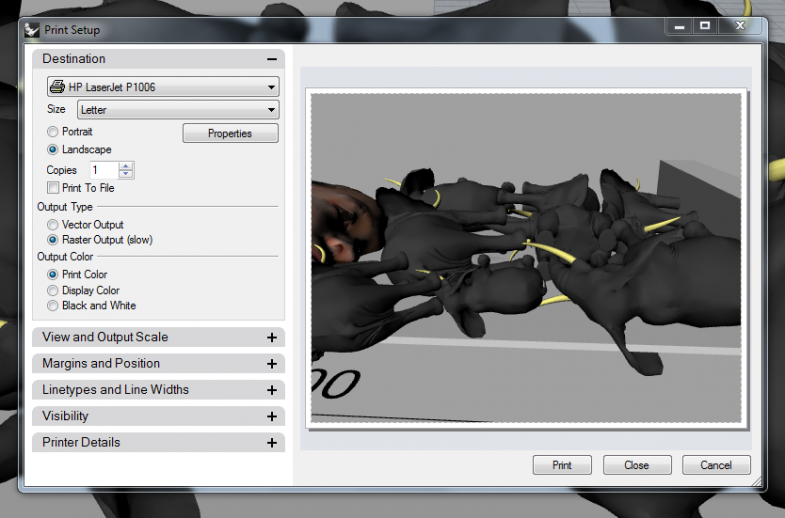
In the perspective window, orient your view so you're looking down on your design, and then click  CTRL and P at the same time.
In the perspective window, orient your view so you’re looking down on your design, and then click CTRL and P at the same time.
If your project is hard to see in rendered mode then you may want to switch to shaded mode.
Be sure to choose the “raster output” option.  This will make the printout much easier to see.
Capture 7
The router will cut the basic shape of your design from above, but it will not remove material from undercut areas. For example, the material underneath the elephant legs will not be cut out by the router. With this in mind, it’s important to print some good reference images of undercut areas from the side view so you’ll know how to carve your finished form.

I encourage you to print several images of your design from different angles.  These images will be invaluable when working in the sculpture studio.

notes from 10/9

The minimum tolerable thickness for a part is 1/4 inch.

The router bit we’ll use to cut the designs is 5/8 inch, or .625.  The router will not enter a gap that is smaller than .625.

Use the drape command periodically from the top view to get a sense of what your design will look like after it is cut.

Coleman 220 Availability  

Oct. 7 – 11 am to 11 pm

Oct. 8 – 8 am to 10 am, 12 pm to 1 pm, 3 pm to 11 pm

Oct. 9 – 8 am to 9 am, 11 am to 11 pm

Oct. 10 – 8 am to 10 am, 11 am to 1 pm, 3 pm to 11 pm

Oct. 15 – 8 am to 9 am, 11 am to 1 pm, 5 pm to 11 pm

Oct. 16 – 8 am to 9 am, 11 am to 2:30 pm, 4 pm to 11 pm

Oct. 17 – 8 am to 1 pm, 3 pm to 11 pm

Oct. 20 – 8 am to 1 pm, 3 pm to 11 pm

Oct. 21 – 8 am to 9 am, 11 am to 2:30 pm, 4 pm to 11 pm

Oct. 22 – 8 am to 1 pm, 3 pm to 11 pm

Oct. 23 – 8 am to 9 am, 11 am to 11 pm

Oct. 24 – 8 am to 1 pm, 3 pm to 11 pm

Oct. 27 – 8 am to 1 pm, 3 pm to 11 pm

Oct. 28 – 8 am to 9 am, 11 am to 11 pm

Oct. 29 – 8 am to 1 pm, 3 pm to 11 pm

Oct. 30 – 8 am to 9 am, 11 am to 11 pm

Oct. 31 – 8 am to 1 pm, 3 pm to 11 pm

Required Rhino tutorials

Setting up the work area:

video platform video management video solutionsvideo player

————————————————————————————————————–

Working with meshes

video platform video management video solutionsvideo player

Note: If these videos don’t display in your web browser, be sure that you’re at http://sculpture1.blogs.bucknell.edu instead of https://sculpture1.blogs.bucknell.edu. Apparently, removing the “S” from the http makes a big difference in the security settings for the page.

Optional Rhino tutorials

Get started in Rhino by building a simple castle – This demo will teach you how to work with curves, how to create and modify surfaces, how to rebuild surfaces to add complexity, how to extrude curves and surfaces, and how to use the revolve command.

video platform video management video solutionsvideo player

————————————————————————————————————–

Basic methods of creating angular and organic forms in Rhino.video platform video management video solutionsvideo player

Note: If these videos don’t display in your web browser, be sure that you’re at http://sculpture1.blogs.bucknell.edu instead of https://sculpture1.blogs.bucknell.edu. Apparently, removing the “S” from the http makes a big difference in the security settings for the page.

Technical crash course for Rhino – Basic commands

  • First, look at menu at bottom of screen. Grid snap, ortho, planar, osnap, smart track should all be turned OFF.  Gumball is the only item that should be ON.  Toggle on and off by left clicking.
  • 4 Viewports
    • maximize or minimize by double clicking the viewport name
    • reset the four viewport layout by clicking the top center button that shows four viewport icon
  • Getting around in the space
    • orbit by holding down the right mouse button and dragging
    • pan by holding down the right mouse button and shift while dragging
    • zoom by rolling the middle mouse wheel
  • Creating basic 3d forms
    • access the “solids creation” submenu by clicking the lower triangle under the cube icon
    • drag the menu by the top bar to keep open
  • Viewing modes (shaded, rendered, wireframe, ghosted)
    • chose by right clicking on the viewport name
  • “Zoom selected” or “zoom selected all viewports” by selecting an object and then typing ZS enter or  ZSA enter
  • Use the gumball to move, scale, and rotate objects
    • gumball is enabled or disabled at bottom of screen by left clicking the button
    • hold shift while dragging a scaling handle to scale objects uniformly
    • learn more by watching the first minute of this video
  • If Rhino locks, look at the command line; you may have accidentally initiated a command. Press escape to cancel.
  • How to select objects
    • left click to select one object
    • to add other objects, hold shift and left click
    • to remove objects from selection, hold control and left click
    • Lasso selection:
      • left click and hold > drag lasso left to select ALL objects touching the lasso
      • left click and hold > drag lasso right to select ONLY the objects within the lasso
  • Make multiples:
    • Copy with CTRL C
    • Paste with CTRL V
  • To eliminate a part, press the delete key


Our class exercises can be found by following this path:  Click the start button (lower left corner of the screen) > click Computer > Projects  > Digital Sculpture > Private > Exercises > 1-16-2014